

How To Download Find My Iphone On Mac
Storing iPhone backups on a Mac with limited storage is catchy. Instead of deleting old iPhone backups, you tin can movement them to a different location, like an external drive.
This is a good way to reclaim space on your Mac and salvage future backups directly to external storage. Follow the steps in this guide to find your existing backups, move them to an external bulldoze, then salvage all your subsequent backups to that drive likewise.
Step i. Find Your iPhone Backup on Your Mac
While backing up an iPhone to iCloud is easier, keeping a local iPhone backup on your Mac too has its perks. For starters, you lot can restore your fill-in without needing an cyberspace connection or waiting for a long download.
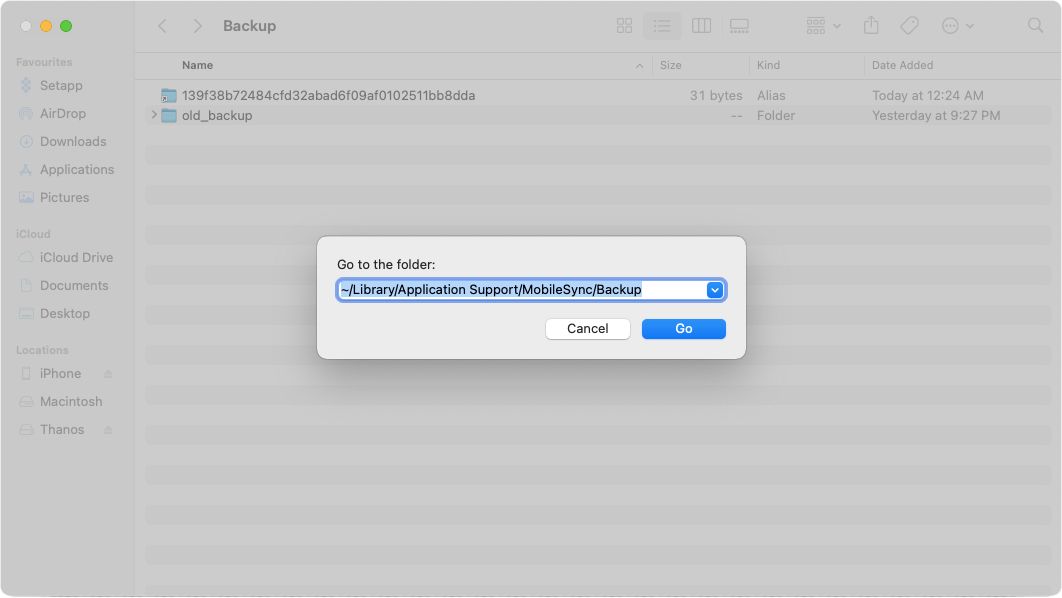
By default, your Mac stores the iPhone backup in the MobileSync folder at a specific location. Open Finder and select Go > Go to Folder from the carte bar, then enter this file path to get to that folder:
~/Library/Application Support/MobileSync/Backup You'll observe folders with alphanumeric names in this Backup folder. But if you lot haven't ever made a backup, you won't see annihilation.
In that case, back up your iPhone to your Mac start. On Macs running macOS Catalina, Big Sur, or college, use Finder to support iPhone. You have to use iTunes to back upward the iPhone on your Mac if information technology runs macOS Mojave, High Sierra, or older.
After creating a fill-in, you should see an alphanumerically named folder appear in the Fill-in folder.
Footstep 2. Move Your iPhone Backups to an External Drive
Now that you know where your iPhone's backups are stored on your Mac, moving them to an external hard drive is easy. Before proceeding, make a fresh backup of your iPhone on your Mac. So command-click the iPhone fill-in folder and select Copy.
If you don't know which folder is for your iPhone, select each one and press Cmd + I to get data about it. Choose the binder with a modification date and time that matches the fill-in you just made.
Bold you lot've connected an external drive to your Mac, create a folder with an easily recognizable proper noun such as NewiPhoneBackup or anything you like.
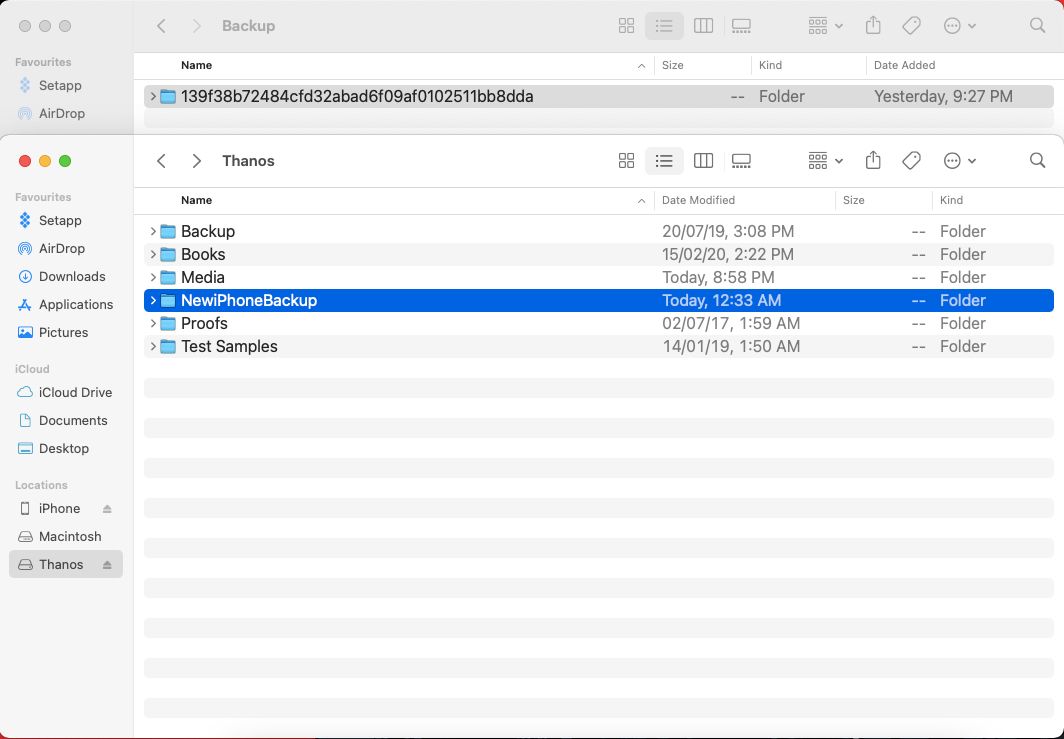
Then paste your iPhone fill-in into the NewiPhoneBackup folder. The transfer might take a while, depending on the size of your iPhone backup.
Get back to the original location of the iPhone backups on your Mac. Make a note of the alphanumeric folder proper noun. Then rename the iPhone backup binder to OldBackup, or anything else y'all similar.
That'll retain the backup folder'due south contents in case something goes wrong later. So don't delete information technology merely even so.
Stride three. Create a Symlink to Apply Your External Drive as the Backup Location
Yous tin employ a symbolic link (symlink) to make the file or binder appear as if information technology exists in a unlike location. Applications read and utilise the symlink to point at a different target location.
Creating a symlink for your iPhone backups will make Finder redirect to your external bulldoze when accessing and updating your backup folders.
Give Final Full Disk Access
First yous demand to give the Terminal app the necessary permissions to create a symlink. Hither's how to do that:
- Open System Preferences on your Mac and select Security & Privacy.
- Select the Privacy tab.
- Click on the lock icon at the bottom-left corner, then enter your administrator's countersign.
- In the sidebar, curlicue down and select Full Disk Admission from the list.
- Enable Terminal in the list of apps on the right, then click the lock icon again to save these changes.
Create Your Symlink
At present you lot can employ the following command to create a symlink. Nonetheless, you demand to use the exact file paths and folder names to lucifer your external drive and your original backup binder.
Open Concluding, and blazon the post-obit symlink command, replacing the locations in square brackets to lucifer your estimator:
ln -s /Volumes/[External Drive]/[New iPhone Backup Binder] ~/Library/Application Support/MobileSync/Backup/[Original Backup Folder] Here are a few tips to follow while using different paths with this command:
- Brand sure your hard drive is formatted to piece of work with macOS. Refer to our guide to set up if your external hard drive is not showing up on Mac.
- Supercede [External Drive] with your external drive proper noun. If its name has ii words, add a \ after the first give-and-take and capitalize the names accordingly.
- Replace [New iPhone Backup Folder] with the proper name y'all created for your iPhone fill-in folder on the external drive.
- Replace [Original Fill-in Folder] with the exact alphanumeric folder proper noun for the iPhone fill-in on your Mac. You lot probably need to re-create and paste this to get information technology right.
Here'south how the command looks in Terminal for our computer:

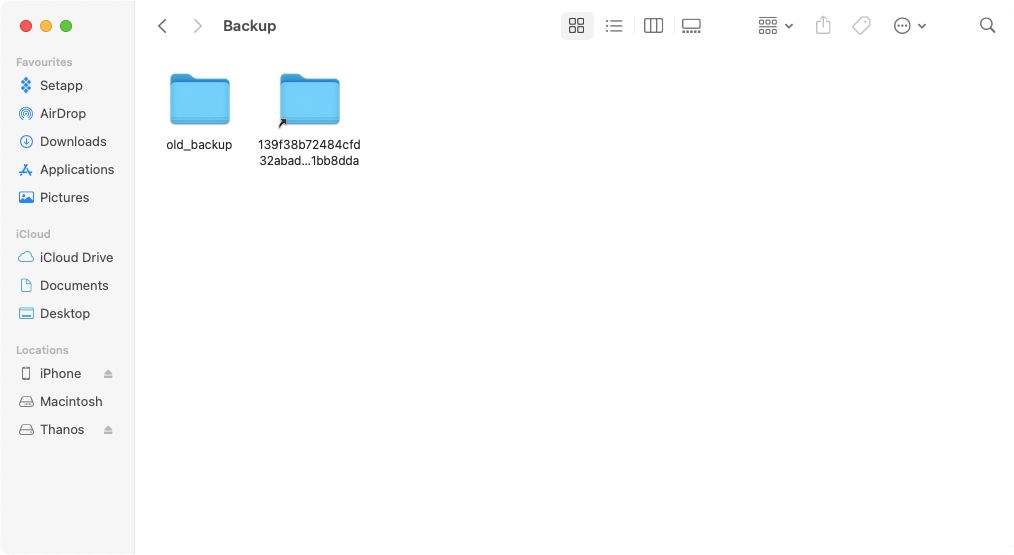
After you run the control, yous'll see a new folder icon with an arrow on its lesser-left corner and the same alphanumeric proper noun as the original iPhone fill-in.
To cheque whether the symlink works or not, try making a new iPhone backup.
If the symlink works equally expected, back up your iPhone to iCloud equally an actress prophylactic net, and then delete the OldBackup binder from your Mac to gratis up drive space.
At any indicate in the time to come, you can delete the backup folder'due south symlink to finish using the external bulldoze as the backup location.
Step 4. Disable Automatic Backups When You Connect Your iPhone
If your external bulldoze isn't always connected to your Mac, macOS might throw out an error when you connect your iPhone. To fix that, disable the automated sync option from Finder for your iPhone.
Connect your iPhone to your Mac, then click it in the Finder's sidebar.
On the right, make certain you're on the General tab and disable the checkbox in front end of Automatically sync when this iPhone is connected.
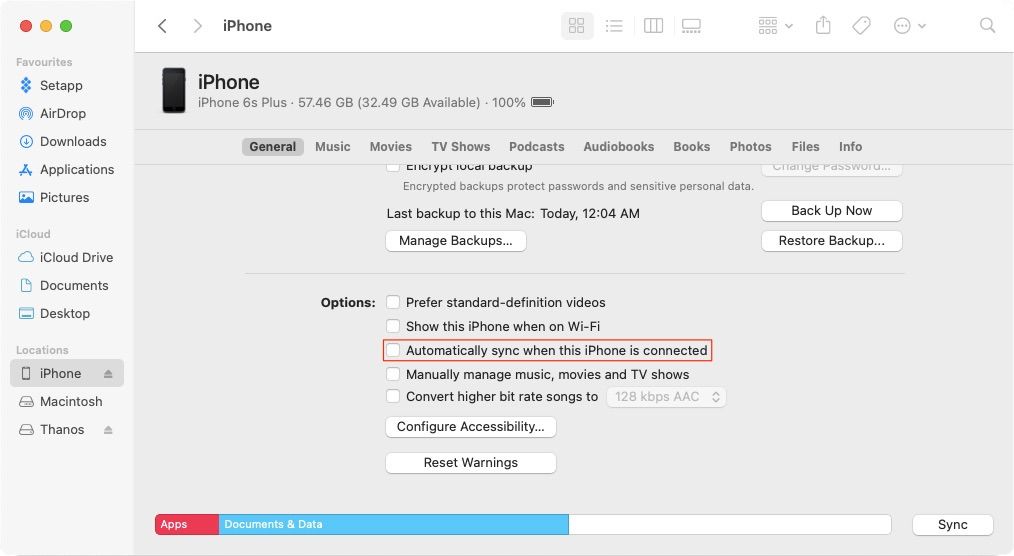
That stops the Finder from trying to automatically sync your iPhone with the new backup binder on your external bulldoze. It as well means you'll accept to connect the relevant difficult bulldoze and manually take iPhone backups.
Redirect iPhone Backups to External Bulldoze to Reclaim Space
Moving iPhone backups to an external drive will save a lot of drive infinite on your Mac. Also, you lot can rely on local backups to restore your iPhone without worrying virtually any network connectivity glitches.
While that sounds convenient, it's besides wise to support your iPhone to iCloud as a 2d safety net. That style you've got plenty of options if you ever need to restore your iPhone.
Almost The Author 

Source: https://www.makeuseof.com/back-up-iphone-to-different-location-on-mac/
Posted by: matthewswitteat86.blogspot.com
0 Response to "How To Download Find My Iphone On Mac"
Post a Comment